Understanding Roofing Underlayments and Their Role

understanding roofing underlayments role

There are several important components that play a role in the typical roof and its ability to protect structures, and knowing about these is helpful for many home and building owners. One great example here that’s less well-known than certain other roofing components is known as roofing underlayment.

At The Roof Doctor, we’re happy to help with a wide variety of roof installation and repair services for shingled roofs, slate roofs, shake roofs and many other types for clients in Salt Lake City and West Jordan. What exactly is roofing underlayment, which types of underlayment are out there today, and what important roles does underlayment play in maintaining your roof’s quality? Here are some basics.

Roofing Underlayment and Deck Basics

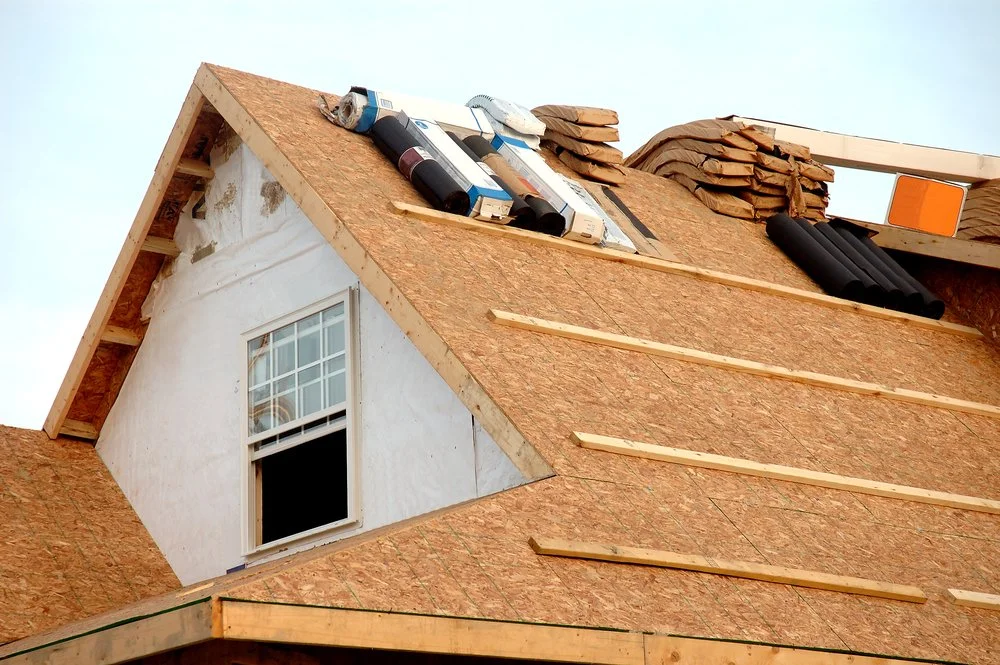
To fully understand how roofing underlayments work, you also have to know about roof decks and their role. The roof deck, also sometimes referred to as roof sheathing, is made from plywood, OSB, wood planks, or skip sheathing, and involves boards fastened onto rafters or trusses to form the surface for roofing products and materials.

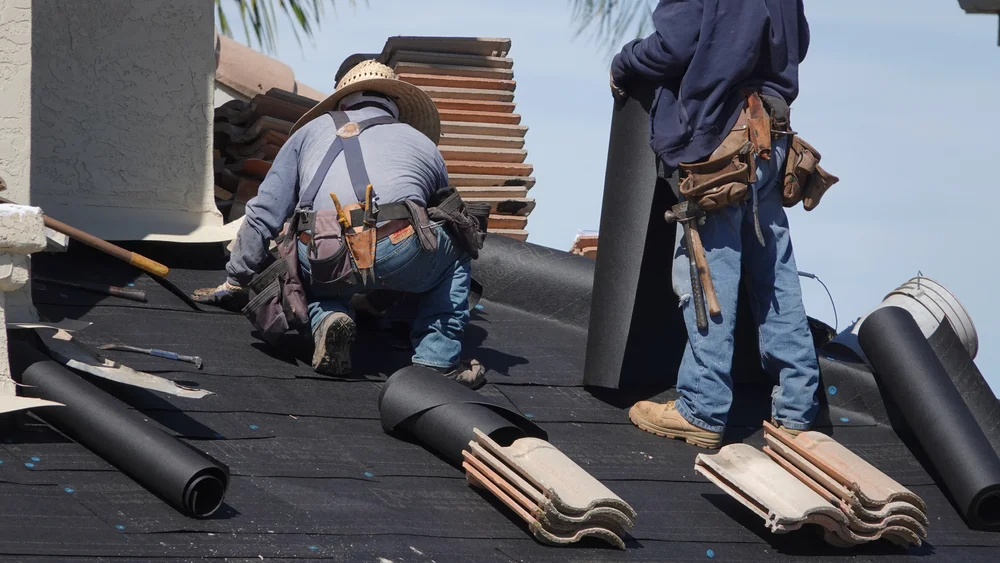
Roof underlayment is installed over the roof deck, typically above a layer of self-adhering membrane located at the eaves. It offers secondary protection from several elements, such as ice damming and wind-driven rain.

Specific Purposes of Underlayment

While your roof’s shingles are its primary defense against things like the sun’s rays, precipitation, wind, ice and more, the underlayment is a secondary form of protection here as well. It serves a few important roles:

  • Safety in case of shingle blow-off: In cases where severe weather may tear off shingles, the underlayment is an additional layer of protection against water intrusion. This is vital if the shingles are not quickly repaired or replaced following a severe storm.
  • Moisture protection: The underlayment helps to protect your roof deck in case of any moisture that may leak through the shingle layer – it prevents water from saturating and damaging the plywood and other underlying materials.
  • Ice dam prevention: During the winter, ice dams can form on roofs and cause water to back up onto the deck. This is where underlayment helps once again. It adds another layer of protection to help prevent damage from ice buildup on your roof.
  • Assistance with shingle installation: Since underlayments are applied before shingles during roof installations, they help protect the entire roof deck while the shingle materials are being installed making shingle installation much easier.

Types of Underlayment

Today, there are several types of underlayments that each have their own specific benefits in terms of protection, cost and ease-of-installation. Here are some of the top options:

  • Felt underlayment: The oldest and perhaps most well-known type of underlayment among homeowners is felt paper. It’s made from layers of either organic or fiberglass material and can offer a good level of protection against moisture. This type is also sometimes known as “tar paper” and comes in a couple different weight options. It’s commonly found on shingle, slate or wood shingles, though its use may depend on the region and the weather.
  • Self-adhered underlayment: If you’re looking for an underlayment with great water resistance, self-adhered options come with high levels of asphalt and rubber polymers. This type of underlayment is also known as “ice and water shield”. And as its name suggests, this type has a sticky back and can be easily applied to any roof. It’s commonly used in high-leak-risk areas like valleys, eaves, dormers and rakes.
  • Synthetic underlayment: Synthetic materials are gaining traction in the roofing industry due to their superior resistance to water, as well as their light weight and easy installation. They’re also designed for better breathability than felt or self-adhered options, which helps with ventilation during hot summer. They’re resistant to mold and mildew growth, as well as punctures and tears in cases of strong winds.

Protecting Your Underlayment

While roof underlayment typically won’t need much maintenance, there may be times when it’s necessary to inspect or repair any sections that have been damaged by debris, weather or other elements. It is important to remember to follow all safety guidelines while inspecting and maintaining your roof underlayment, such as using a safety harness and ladder.

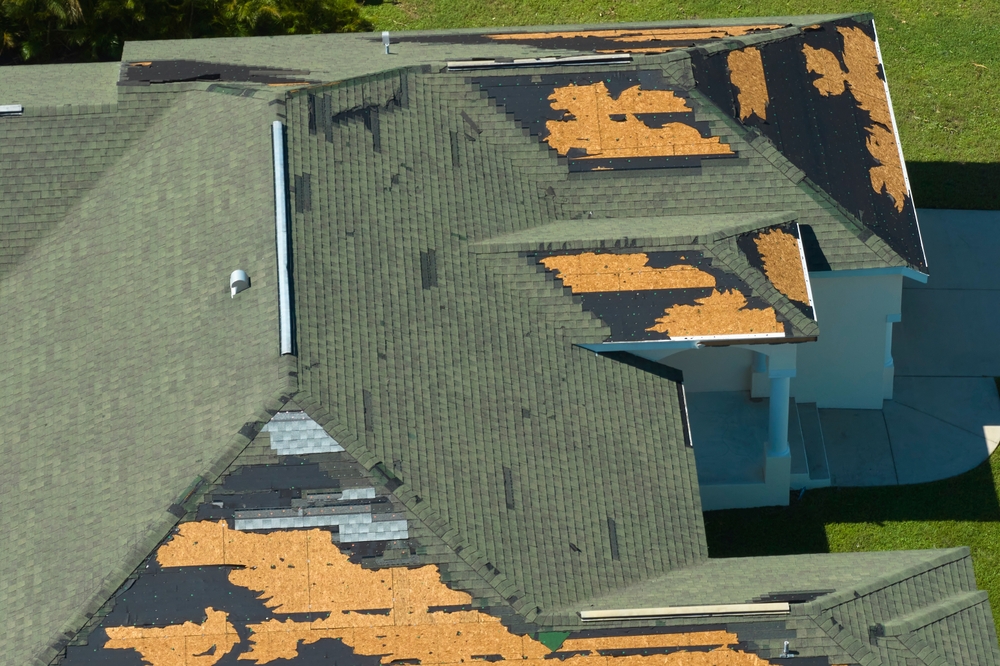
One particular concern is if you notice missing shingles that have exposed your underlayment. In these cases, be sure to check if the underlying material is still intact and not showing signs of damage from water intrusion. If this is the case, it’s a good idea to replace any shingles as soon as possible to prevent further damage or potential leaks in the future.

By understanding roof underlayment and its many benefits, you can ensure that your roof is well-protected and able to withstand any weather conditions. For more here, or to learn about any of our roofing installations or other services for SLC and West Jordan clients, speak to our team at The Roof Doctor today.

All You Need to Know About Roof Warranties

need know roof warranties

Warranties are a common topic when you’re dealing with high-value items, and particularly in the world of real estate. One home component that will often be covered by a warranty of some type is your roof, and knowing how roof warranties work and what’s covered under yours is typically very important.

At The Roof Doctor, we’re happy to discuss warranties and other forms of protection for any of our new roofing products, which include slate roofs, metal roofs and many other options. What are the different kinds of roof warranties that might be available to you, how do you understand which areas are covered within yours, and what else do you need to know here? Let’s have a look at this important area.

Roof Warranty Basics and Types

For those who are buying a new roof or having one installed, warranties typically come in two types. These are:

  1. Manufacturer’s Warranty – This warranty is provided by the company who manufactured your roofing material and is generally valid for around 10 to 20 years. It will cover any defects that occur as a result of the manufacturing process, such as issues with the materials used.
  2. Installation Warranty – This warranty is provided by the roofing contractor and will cover any issues that arise as a result of their installation processes. Generally, these warranties are in effect for up to one year post-installation and they’ll protect you from any issues or damage resulting from faulty workmanship on the part of the contractor.

What’s Covered?

When it comes to knowing what is and isn’t covered under your roof warranty, you’ll need to read through your specific contract carefully. For manufacturer warranties, some of the elements covered will typically include:

  • All major components of the roof, including shingles, flashing and sealants
  • Any manufacturer defects that may be present
  • Water damage from faulty shingle installation

It’s vital to keep in mind that with many roof manufacturers, there will be strict conditions attached to their manufacturing warranties. For instance, they may only cover a product if a defect specifically results in a leak, plus if the installation was carried out exactly to manufacturer specifications. It’s very important to be sure you know these particulars for any warranty you receive from a manufacturer.

For installation warranties, the coverage will usually include:

  • Any problems caused by faulty workmanship on the part of the contractor
  • Malfunctioning parts due to improper installation

It’s important to remember that while these warranties will cover any of the issues above, they won’t typically cover things such as wear and tear or storm damage. If you’re looking for protection in those areas, you may need to look into getting an additional roof insurance policy.

Limited, Lifetime and Extended Warranties

You may see a few different terms used when it comes to roof warranties, such as limited, lifetime and extended warranties. A limited warranty is one that only covers certain elements of the installation or material for a set period of time. Lifetime warranties are usually reserved for higher-end materials, like metal roofs, and they cover those materials indefinitely against any manufacturer defects.

Finally, an extended warranty is an additional policy that can cover your roof beyond the terms of the original warranty. This is a good option for those who want extra protection and peace of mind.

The GAF Golden Pledge Warranty

At The Roof Doctor, we’re proud to offer one of the single best warranties in the entire roofing industry: The GAF Golden Pledge Warranty. This is a limited lifetime warranty, meaning you’ll always be covered in some way, and it is completely non-prorated for the first 50 years. Here are some of the elements that make the GAF Golden Pledge Warranty so valuable:

  • 25-year workmanship warranty: Not only is this a very long period of time for any workmanship warranty, this warranty is relatively flexible. It covers even situations where a product was misapplied or improperly installed, unlike many others.
  • Wind warranty: For those in windy areas, this warranty carries wind coverage up to 130 mph – the only exception here is the Timberline HDZ, which actually comes with an infinite wind warranty instead!
  • Fully transferable: If you’re looking to sell your home or building in the near future, this warranty is easy to transfer.
  • Fully backed by GAF: GAF, a leader in the roofing industry, backs this warranty in full. Even if the contractor you’re working with goes out of business or has some other issue, GAF will send a different Master Elite contractor and will cover the entire bill. In fact, at The Roof Doctor, we proudly serve as the first contractor GAF calls in the greater SLC area when there’s a problem with another contractor – this is due to our reliability and consistency.

Roof warranties are an important part of owning any property, but knowing exactly what is and isn’t covered and whether a warranty can be transferred is often the key to making sure you’re properly protected. Be sure to read through your specific contract carefully and ask any questions you may have of your roofing manufacturer and contractor before signing on the dotted line.

This will help ensure that you understand exactly what type of coverage you’re getting – and that you can trust it to protect your property for years to come.

For more here, or to learn about any of our roof installation or roof repair services, speak to our team at The Roof Doctor today.

Considering Ice or Water Barriers for Your Roof

ice water barriers roof

We’re smack dab in the middle of the Utah winter currently, and the roof is one of several key home or building components that owners will be looking to protect from the elements. For certain roof systems, particularly those that have dealt with moisture issues in the past, certain specific items or accessories might be useful here, and the best example is the world of ice and water barriers.

At The Roof Doctor, we’re happy to assist clients with all of their roof needs, including installation of slate roofs, metal roofs and many others. We’ll sit down with you to discuss any issues your roof is having, including situations where you believe ice or water barriers might be useful for your setup. What exactly are these barriers, what are the key issues they help protect against, and should you consider them for your roof? Let’s have a look.

What Are Ice and Water Roof Barriers?

For those who are unfamiliar with these products, ice and water barriers for roofs refer to various forms of underlayment that are applied beneath the shingles and other roof coverings. They are typically applied directly to roof decking, and seal tightly around the nails. The primary purpose of these barriers is to provide an additional layer of protection against water infiltration, should there be any penetration or cracks in the shingle system.

Ice and water barriers also help protect against major temperature swings that could lead to ice-dam formation, which can cause tears or breaks in the roof and result in costly repairs. These barriers also help to prevent leaks by providing an additional layer of protection that’s designed to be watertight for many years.

Specific Risks Ice and Water Barriers Protect From

There are several risks that ice and water barriers protect against, primarily related to moisture buildup:

  • Ice dams: One of the most potentially worrisome risks for a roof is the formation of ice dams. In extreme cold weather, water can freeze along the edges of your roof and form a dam-like structure which prevents further melting snow from properly draining off your roof. This can result in major leaks inside your home or building, potentially leading to many thousands of dollars in damages. But with an ice and water barrier installed, you can minimize the risks of ice dams forming.
  • Water infiltration: Even in moderate climates without heavy snowfall or extreme temperature swings, normal rainfall can still cause leaks within your roof if it breaches any cracks or gaps in the shingle system. An ice and water barrier helps to protect against this by providing an extra layer of moisture-proofing that helps keep water out.
  • Gutter clogs: Another risk related to extreme cold weather is the potential for gutters and drains to become clogged with ice. This can result in water pooling up on your roof, leading to a range of issues including structural damage from increased weight and further moisture infiltration through the shingle system if not addressed quickly. The extra layer of protection provided by an ice and water barrier can help to mitigate these risks.
  • Wind damage: Finally, wind-driven rain and storms can also cause damage to roofs if not properly protected. An ice and water barrier provides an extra layer of protection that helps keep wind-driven rain out of the shingle system, minimizing the risks of potential leaks in these types of scenarios.

Areas of the Roof Where Ice or Water Barriers Are Placed

While ice and water barriers can technically be placed just about anywhere, here are some of the most common locations where they’ll be installed on roofs:

  • Eaves: Because the edges of a typical roof are exposed, they can be particularly vulnerable to water damage in extreme weather. Installing an ice and water barrier along the eaves of your roof can help protect it from any moisture infiltration.
  • Valley flashing: Valley flashing is a special type of flashing that runs in between two sections of the roof at a 90-degree angle, typically where two sloping surfaces meet. It’s important to use a special ice and water barrier product when installing this type of flashing, as it helps keep moisture out and protect your roof from any leaks along the valleys.
  • Roof penetrations: For various penetration types, such as for skylights, plumbing vents, or other roof accessories, it’s important to use an ice and water barrier product around the perimeter of these penetrations as well. This helps prevent any moisture from seeping underneath the shingle system and causing potential damage.
  • Entire roof: In other cases, a roof may be covered completely with an ice and water barrier in order to provide extra protection against any moisture-related issues.

Should You Install Barriers?

Whether you’re ordering a new roof or considering your current roof maintenance plan, taking the time to consider installing ice and water barriers can help protect your home or building against a range of potential risks related to moisture. It’s important to consult with a professional contractor in order to understand the specific needs for your roof system, as well as any additional considerations that may need to be taken into account.

In many cases, a professional will recommend installing barriers if you’ve had prior moisture-related issues or if you live in an area with extreme weather conditions. However, even if these factors don’t necessarily apply to your situation, it’s still worth considering, as the extra layer of protection provided by a barrier can be valuable in preventing future headaches.

For more on ice and water barriers for your roof, or to learn about any of our roof installation or replacement services, speak to our team at The Roof Doctor today.

On the Process of Manufacturing Roofing Shingles

process manufacturing roofing shingles

Knowing the ins and outs of how certain products or items in our lives work can be valuable for both curiosity and practical reasons alike, and this is especially true within important home systems like your roof. One particular roof component that many home or building owners typically wonder about in this vein: Their shingles. What exactly are shingles, and how are they made?

At The Roof Doctor, we’re here to help with numerous residential roofing services, with expert roofing staff who are always happy to go over product specifications or other important details with you. Starting with their earliest manufacturing phase and running all the way to when they’re installed on your home or any other building, here’s a look inside the process of how asphalt shingles are made.

The Membrane

In most cases, the first major stage of manufacturing for asphalt shingles will involve a sheet of fiberglass membrane. This sheet might be made from straight fiberglass, or it could originate from certain organic fibers like wood chips, cardboard and paper. In either case, these materials come in large rolls that are unrolled to create individual products.

The purpose of this membrane is to give the shingle base an appropriate amount of thickness and reinforcement — in effect, creating a more durable foundation that can withstand weathering, wear and tear over time. This membrane will eventually sit beneath the shingle and weatherproof coating to come.

It’s meant to bring not only a strong base, but also protection from several threats. It’s a key player in fire resistance, for example, and it also protects against wind damage by filling any gaps or holes that might open up in the shingle’s foundation over time.

Asphalt Layer

Once the membrane has been laid out and cut to the proper size required for your shingles, it will be covered with hot asphalt. This is similar to standard asphalt pavement, and it will be spread over the membrane in order to create a solid, weatherproof foundation for the shingles.

For those unaware, asphalt is a semi-solid form of petroleum that is mixed with stone and sand to create a more durable composite. Given how it’s made of natural materials, asphalt can be seen as something akin to a renewable resource — depending on the exact source used during manufacturing.

When applied to the shingle foundation, this asphalt layer will also serve as an adhesive that holds everything together. It provides plenty of protection against common shingle threats like early clogging or weathering, and it also bolsters the bond that holds the rest of the asphalt shingle together.

In some cases, additional ingredients will be added to the asphalt layer as it’s being poured on the membrane. These ingredients may have a few purposes, but one of the most common is increasing fire resistance through the use of fire retardants. Natural ingredients like limestone or calcium carbonate are often at play here, and they help to keep the asphalt layer from catching fire under most normal circumstances.

Granule Addition

As the asphalt is still being poured onto the membrane and its heat remains high, granules will be pressed into the asphalt itself during the cooling process. These granules usually refer to small pebbles or stones, and they come in several different colors.

Granules serve several purposes, including providing another form of protection to the shingle. They will usually provide resistance against common weathering threats like sun or wind damage, and they can also help counteract some very common forms of damage from things like rain or water pooling. Some are even specifically designed to resist algae growth or other forms of contamination. In addition, granules are added to help the shingle surfaces from sticking to one another during packaging.

Of course, granules are also meant to offer aesthetic appeal. When you see a roof with shingles, this is one of the first things you’ll notice — a coating of small pebbles. The color and appearance of these granules can vary greatly depending on who makes them, but they’re typically meant to complement the rest of your roof and home design in some way or another.

Packaging

Once the full shingle has been created, it will then be cut into single shingles. These usually measure 12 inches by 36 inches, though some may be slightly longer or shorter than this depending on the company.

In some cases, shingles will be packaged together in groups to make it easier for those working with them during installation. It’s also common to use separate packaging materials in order to keep individual shingles from sticking together and creating a mess when they’re being removed.

Proper Installation

The job is not finished once a shingle has been cut and packaged, however. In order to be effective and long-lasting, a roofing material like asphalt shingles must always be installed the right way.

Basically, this means ensuring that there are no gaps between each individual shingle when they’re being lined up next to one another. Shingle spacing can be checked through use of a chalk line, and the shingles must also be held into place with nails that don’t penetrate too far.

This is one of many areas where our team at The Roof Doctor can help — we have years of experience when it comes to installing shingles the right way, and we can apply this expertise to making sure your roof is well-protected. For more information on shingles or any other roofing systems, contact us today!

Roofing Themes to Consider If You’ve Just Bought a New Home

roofing themes new home

There are a number of specific components you may be thinking about if you’ve recently purchased a home and are assessing its quality, and one area that cannot be overlooked here is the roof. Even if you’ve been diligent in your purchasing process and have bought a home with a quality roof that’s relatively new, there will be a point at which you have to consider certain repairs or other fixes, and priming yourself for this ahead of time is valuable.

At The Roof Doctor, we’re happy to help. We assist any and all clients with their residential roofing needs of all shapes and sizes, whether you have specific and immediate roofing issues that need addressing or are simply looking for a long-term partner for roof inspections and care. What are a few simple tips we offer to new homeowners on how to assess and understand their new roofing setup? Here are a few valuable themes.

Pre-Purchase Roofing Considerations

Firstly, we also want to speak briefly to those who are still in the process of negotiating a home purchase. It’s so important that you do not overlook the roof during this time! If you’re working with a quality real estate agent, they will hopefully bring any big-ticket items to your attention.

But it’s always good to get a second opinion, and if you have any doubts whatsoever about the state of the roof, it is worth getting a roofing professional to take a look. This is a significant investment, and you want to be as confident as possible in every element of the purchase.

Take a Quick Look

When you’ve finalized your purchase and are moving into your new home, take a few minutes whenever it’s convenient to just walk around the property and check out the roof from different angles. It doesn’t have to be a comprehensive or exhaustive inspection, but getting a general sense of its condition and any potential problem areas is valuable.

Of course, if you see anything that looks like an immediate issue, don’t hesitate to give us a call right away! We’ll be happy to help. But as much as anything else, this is just an opportunity to familiarize yourself with one of the most important components of your new home. How does your roof slope? Where are the gutters and downspouts located? Just getting a general sense of these basic details is helpful.

Know Your Primary Roofing Material

Another big theme to consider is your primary roofing material, as this will obviously have a big impact on the care and maintenance required over time. At The Roof Doctor, we work with all sorts of common roofing materials, including asphalt shingles, metal roofs, tile roofs, and more.

Asphalt shingles are by far the most common, and they offer a number of advantages in terms of cost, installation, and repair. But every material has its own quirks and benefits, so it’s worth doing a bit of research on your specific setup. This will help you understand what to expect down the road.

If you can’t tell which roofing material you have, or if you have any questions whatsoever, please don’t hesitate to reach out and ask. We’re always happy to help new homeowners get a handle on their roofing situation.

Care for Your Gutters

While gutters are technically separate from your roof, there’s no question these components are closely related, and they work together to protect your home from water damage. As such, it’s important to make sure your gutters are in good condition and properly maintained.

The gutters should be cleared of any debris on a regular basis, and you also want to be on the lookout for any signs of sagging or other damage. These issues can often be addressed relatively easily, but it’s important to catch them early before they become bigger problems.

Check Interior Ceilings

Both during your initial walk-around inspection and on a regular basis thereafter, it’s also a good idea to take a quick look at the ceilings in your home for any signs of water damage. This can obviously be a sign that there’s an issue with your roof, but it can also indicate problems with your gutters or downspouts.

In any case, if you see any signs of water damage in your home, it’s important to call a professional right away to assess the situation and make any necessary repairs.

Monitor for Shingle Granules

If you have an asphalt shingle roof, another big theme to be aware of is shingle granules. These are the small pieces of stone or other material that make up the surface of the shingles, and over time, they can begin to degrade and fall off.

This is a normal part of the asphalt shingle roof lifecycle, but it’s important to keep an eye on granule loss to ensure it’s not happening at an accelerated rate. This could be a sign of a bigger problem, and it’s something we can help you assess and address.

Leave Repairs to the Pros

Whether immediately upon moving into your new home or at some point in the future, you may be tempted to take on roofing repairs yourself if you notice any issues. But as much as we understand the DIY impulse, this is almost always a bad idea.

Roofing repairs can be dangerous, and they often require specialized tools and materials. It’s almost always better to leave repairs to the professionals. Not only will this ensure the job is done right, but it will also help you avoid any potential accidents or injuries.

At The Roof Doctor, we’re here to help new homeowners with all their roofing needs, from inspections and repairs to maintenance and more. If you have any questions or concerns, please don’t hesitate to give us a call.

On Fire and Resistance Ratings for Asphalt Roof Shingles

fire resistance ratings roof shingles

The primary job of any roof is to protect building occupants from risks of any kind, and these include major disaster risks like fire, floods and related areas. With regard to these kinds of disasters and major threats, one of the most important components on your roof is shingles, which are primarily made from asphalt.

At The Roof Doctor, we’re here to assist Salt Lake City and other Utah clients with a wide range of roof needs, including roof replacement, roof repairs and more. When installing any kind of new roof, we’ll be sure to inform you of basic qualities like fire resistance and others in this realm, as we know how important protection from these kinds of risks is to you and your family. Here are some basics on the ranges of protection you’ll typically see in these areas when utilizing asphalt shingles, plus what to be thinking about with regard to these kinds of threats.

Fire Ratings

Especially in a place like Utah, where extremely dry conditions in the summer can sometimes lead to fire risks, it’s vital to know that your roof can put up a good fight in the event of a fire. All asphalt shingles will come with some kind of fire rating, which is generally either Class A, B or C. Here’s a look at what these different ratings actually mean:

Class A: This is the highest possible rating and means that the shingles give the roof deck a “high” degree of fire resistance. In order to receive this rating, the shingles must be tested in accordance with ASTM E108 or UL 790 and found to have a self-ignition temperature of more than 650 degrees Fahrenheit (F).

Class B: This is the second highest rating and means that the shingles give the roof deck a “moderate” degree of fire resistance. In order to receive this rating, the shingles must be tested in accordance with ASTM E108 or UL 790 and found to have a self-ignition temperature of more than 575 degrees Fahrenheit (F).

Class C: This is the lowest possible rating and means that the shingles give the roof a “slight” degree of fire resistance. In order to receive this rating, the shingles must be tested in accordance with ASTM E108 or UL 790 and found to have a self-ignition temperature of more than 450 degrees Fahrenheit (F).

As you can see, there’s quite a range in protection levels here, so it’s important that you be aware of them and know which is best for your needs. Typically, Class A is the best option if it’s available to you, as this gives the highest level of protection.

Now, fire resistance is not the only important theme in this overall realm. Our next few sections will look at some other vital factors to ask about when installing new roofs or shingles.

Wind Resistance

Another important factor to consider is wind resistance, as this can be vital in protecting your roof (and therefore your home or business) from damage in high winds. All asphalt shingles will come with a wind rating that’s generally anywhere from 70 to 150 MPH of protection.

This is generally plenty for most needs, but if you live in an area that’s particularly prone to high winds (such as near the coast), you may want to consider shingles that offer even higher protection in this realm. For instance, shingles installed with an Owens Corning or similar high-level sealant may be able to resist higher wind speeds.

Algae Resistance

Another factor to consider is algae resistance. This is particularly important in areas with high humidity levels or that are prone to moss and other growths. All shingles will come with an algae resistance rating, which is generally either Class I, II or III. Here’s a look at what these different ratings actually mean:

Class I: This is the highest possible rating and means that the shingles are highly resistant to algae growth.

Class II: This is the second highest rating and means that the shingles are moderately resistant to algae growth.

Class III: This is the lowest possible rating and means that the shingles are slightly resistant to algae growth.

As you can see, there’s quite a range in protection levels here, so it’s important that you be aware of them and know which is best for your needs. Typically, Class I is the best option if it’s available to you, as this gives the highest level of protection.

Also important here is the type of sealing used on the shingles. Some types of sealants are more resistant to algae growth than others, so this is something to ask about when you’re shopping for shingles.

Watertightness

Another form of protection that’s absolutely vital for any roof is watertightness. This is what keeps your home or business dry during rainstorms, snowstorms and other inclement weather. All shingles will come with a watertightness rating that’s generally anywhere from 1 to 10.

The higher the number, the more waterproof the shingles are. So, for instance, shingles with a rating of 10 are the most waterproof on the market, while those with a rating of 1 are the least waterproof.

As you can see, there’s quite a range in protection levels here, so it’s important that you be aware of them and know which is best for your needs. Typically, the higher the number, the better, as this gives the highest level of protection.

There are a few different things that go into a shingle’s watertightness rating. One is the type of asphalt used, as some types are more waterproof than others. Another is the type of sealant used, as some types are more waterproof than others.

For more on how asphalt shingles protect your roof from various disaster threats, or to learn about any of our roofing services in SLC or nearby areas, speak to the pros at The Roof Doctor today.

All You Need to Know About Roof Flashing

need know roof flashing

There are a few components within many roofs that it’s worth knowing about as a resident or building owner, and one of these that sometimes doesn’t get enough attention is flashing. Flashing is a component that plays a major role in preventing leaks and related issues on the roof area, and knowing about it will help you understand how it works, when it might require repairs, and more.

At The Roof Doctor, we’re here to offer a huge range of residential roofing services, including anything you might need involving your flashing. What exactly is roof flashing, what are its top purposes, and what are some various types of flashing that might be useful for your roof? Here’s a basic primer.

Basics on Roof Flashing

For those unaware, roof flashing refers to a component that acts as a preventive seal between the joints in your roof. These joints are particularly vulnerable to leaks, as they provide potential spaces for water and other materials to enter. Flashing is installed over these joints in order to make sure that they’re well-sealed and won’t cause any issues.

Flashing is made out of a variety of different materials, including metals like aluminum, galvanized steel, or copper. In some cases, flashing might also be made out of asphalt-based materials, plastic, or even rubber. The specific material used will often depend on the location and purpose of the flashing itself, and may also be dictated by the type of roof that you have.

The Purpose of Roof Flashing

There are a few key purposes that roof flashing typically serves. First, as we’ve noted, it helps to seal up any joints in the roof and prevent leaks. In addition, flashing can also help to direct water away from areas where it might cause damage, such as near the chimney. Flashing can also help to hold shingles in place, and may even provide additional support for gutters or other components.

In short, roof flashing plays a vital role in protecting your home from water damage, and making sure that your roof lasts for as long as possible. It’s important to keep an eye on your flashing and make sure that it’s in good condition, as any issues with flashing can lead to significant problems down the line.

Areas Where Flashing is Typically Used

In addition to roof joints, there are a number of specific parts of a roof where flashing will often be used. These areas are those where leaks are more likely than in other areas of the roof, and they include:

  • Dormer wall roof surfaces: These are the slanted walls that project outwards from a pitched roof, and they often have windows. This kind of roof surface is particularly vulnerable to leaks.
  • Chimneys: The base of a chimney is another spot where water can enter, and flashing helps to seal it off.
  • Valleys: A valley is the point where two sloped roof surfaces meet, forming a V shape. These are also prone to leaks if not properly sealed. Luckily, using flashing in these areas can help.
  • Skylights: Skylights are another potential leak point, as they’re essentially holes in the roof. Flashing helps to seal them off and prevent any water or other materials from getting inside.

Types of Flashing

When it comes to the types of flashing available, they’re broken down in a few different ways. Some are based specifically on the area of the roof they’re meant to go in, while others are just a general type that can be attached to multiple different roof areas. Here are some of the top options available:

  • Chimney: One of the more specific types of flashing, chimney flashing is installed around the base of a chimney. It’s usually made out of metal, and can help to seal off this vulnerable area.
  • Valley: As we touched on above, valley flashing is installed in the valleys of a roof. Again, this is usually made out of metal, and can help to prevent leaks in these areas.
  • Vent pipe: Vent pipe flashing, on the other hand, is meant to be applied over pipes and flues on your roof, with a cone-shaped design that helps to seal them off. It also has a base flange that fits into the shingles of the roof.
  • Step: If you have a sloped roof or vertical wall that needs flashing, step flashing is a good option. This type of flashing is installed in sections, with each section overlapping the one below it. This helps to create a watertight seal that can prevent leaks. The step seal often contains drip edges to prevent water seeping under the surface at the eaves.
  • Integral: Integral flashing is often used alongside step flashing, particularly when skylights or other openings are present. This type is usually made out of the same material as the rest of the roof, and helps to seal off these vulnerable areas.
  • Saddle: For things like railing attachments, joists and beams, and other such areas, saddle flashing is a good option. This type of flashing is usually made out of metal or plastic, and helps to seal these areas off to prevent leaks.

As you can see, there are a number of different types of flashing available, each of which can be used in specific areas to help prevent leaks. Knowing which type is right for your roof will help you make sure that it’s properly sealed off and protected from the elements.

For more on roof flashing, or to learn about any of our roofing or related services, speak to the team at The Roof Doctor today.

How to Interpret a Roof Repair Estimate

interpret roof repair estimate

When it comes to many services you’re considering for your home or property from outside specialists, receiving a cost estimate before the project begins is a common and often important element of the process. Roof repairs are no exception — property owners who are obtaining such repairs for their structures naturally want to have an idea of what those repairs are going to cost them, and estimates from roofing professionals are the simplest way to glean this information.

At The Roof Doctor, we’re happy to provide cost estimates for any of our commercial or residential roofing services, including repairs you’re in need of. How precise do these kinds of estimates tend to be in the roofing world, and what are the factors likely to impact the total found on your estimate? Here’s a general primer on this important theme.

Estimate, Not a Precise Figure

First and foremost, it’s important to realize that while we’ll do our very best to pinpoint the precise cost of your roof repairs before we start work on them, the estimate you receive is just that — an estimate. It’s based on a number of factors, which we’ll go over in just a bit.

In some cases, unforeseen issues can arise during the repair process that result in additional time or materials being required to complete the job. (This is especially true in the case of older roofs, which may have structural damage that isn’t immediately apparent.) If this happens and the job ends up costing more than we initially estimated, we’ll of course let you know as soon as possible so there are no surprises.

Conversely, it’s also possible that the repairs turn out to be less involved than we initially thought, and thus cost less. In this case as well, you would only be charged for the actual work that was performed.

In any case, it’s important to remember that the estimate you’re given should always be considered a starting point rather than a final figure.

In our next few sections, we’ll go over some of the most common elements that impact your roof repair estimate.

Size and Extent of Damage

One of the first things our roofing professionals will do when you contact us about repairs is to come out and take a look at your roof. We’ll then be able to get a better idea of the size of the repair job and how extensive the damage is.

In general, larger repair jobs or those involving more widespread damage are going to cost more than smaller, more localized repairs.

The Age of Your Roof

Another important factor that will impact your roof repair estimate is the age of your roof. Older roofs are generally going to require more extensive repairs than newer ones, as they’re more likely to have structural damage or other issues.

If you have an older roof, it’s worth considering whether repairs are actually the best option, or whether it might make more sense to replace the roof entirely. Our roofing professionals can advise you on this based on the condition of your roof.

The Materials Used in Your Roof

The materials used in your roof will also play a role in the cost of repairs. Some materials, such as asphalt shingles, are less expensive to work with than others, such as metal.

If you’re not sure what kind of materials were used in your roof, our professionals can help you to identify them. In some cases, it may also be possible to use a different type of material for repairs than was used originally — again, our team can advise you on this.

Labor Costs

Some repair jobs are going to be much more labor-intensive than others. If your roof is easily accessible and the damage is relatively minor, repairs are likely to be fairly quick and straightforward.

On the other hand, if your roof is more difficult to access or the damage is more significant, repairs are going to take longer and be more complex, which will in turn impact the cost. For example, if your roof needs to be partially or entirely replaced, this is obviously going to take more time than making smaller, localized repairs.

In some cases, it may also be necessary to bring in additional labor to complete the job — for example, if special equipment is required.

Disposal Costs

Another potential cost to consider is disposal, a common element of most roof repair jobs. After all, the old materials that are being removed from your roof will need to go somewhere, and in most cases, this will be at an additional cost.

Some companies include disposal in their overall estimate, while others charge it as an additional fee. Be sure to ask about this ahead of time so there are no surprises.

In certain cases, if there’s quite a bit of debris that needs to be removed from the roof or property area, some companies will charge a specific fee for this, rather than including it in the disposal costs.

Material Transportation

Finally, there are some roof repair jobs where materials will need to be brought to the job site, which can impact the overall cost.

For example, if your roof needs to be replaced and materials need to be brought in from off-site, this is obviously going to add to the cost of the job. The same is true if special equipment is required for repairs and needs to be brought to the job site.

In some cases, companies will include the cost of transportation in their overall estimate. In other cases, they may charge it as an additional fee. Once again, it’s important to ask about this ahead of time so there are no surprises.

For more on how to interpret your roof repair estimate and what will be included in it, or to learn about any of our roof repairs, roof replacements or emergency roof services, speak to the team at The Roof Doctor today.

How to Identify Missing Shingles on Your Roof

identify missing shingles roof

There are several important components to most roofs, and shingles are among these in nearly every case. Shingles serve as your roof’s primary form of protection against various elements, from moisture on down the list, and one of the more common roof issues out there today is shingles that are missing from the roof area.

At The Roof Doctor, we’re happy to offer a wide variety of roof repairs and roof replacements, and shingles are a common theme we assist clients with on a regular basis. As a home or building owner, you can play an important role here: Identifying when shingles are missing or otherwise having issues, so that you can call our team for help with replacing or repairing them. What are some of the simplest ways to identify missing shingles on the roof? Here are several basic themes to consider.

Visual Inspection

The simplest and most common way of identifying missing shingles is also the most obvious: Take a look at your roof. If you can see any large patches of exposed roofing material where there should be shingles, there’s a good chance shingles are missing.

The easiest way to do this is to stay on the ground and utilize a pair of quality binoculars, which will help you get a closer look at the roofline without putting yourself in any danger. If you don’t have binoculars, see if there’s somebody else who does (maybe a neighbor or family member) that can help you out.

Another way to do this is to physically get on the roof, which we do not recommend unless you’ve been up there before and are comfortable with the safety themes required. This route should only be taken if you have trouble seeing the roof from the ground, and even then we recommend having somebody else on the ground to help guide you and make sure you’re safe.

If there are any large bald spots or patches where shingles are definitely missing, take note of them. If possible, try to find any smaller areas too, as they may not be as immediately noticeable but still indicate that shingles need to be replaced.

Now, if you find a few missing granules that should be present on your shingles, this usually isn’t anything to be overly concerned about. Shingles will lose some of their granules over time as they protect your roof, and a few missing granules here or there isn’t going to cause any serious damage. Just make sure you’re monitoring the situation so that it doesn’t escalate, and if you ever find a large number of granules in your gutters that’s definitely a sign you should give our team a call as soon as possible.

Other Possible Missing Shingle Indicators

While visual inspections are by far the simplest and most common way of identifying missing shingles, they aren’t the only ones. In some cases, certain other signs taking place within the structure, or even on the surrounding property, may give you some signs that this is happening. Here are some examples:

  • Large quantities of granules: If you’re finding lots of granules, either on the ground around your roof or in your gutters themselves, this is a good indicator that shingles are missing and need to be replaced. As we noted above, just a few missing granules aren’t anything to worry about, but larger quantities definitely are.
  • Leaks: If you’re starting to see leaks in your roof, or even just water stains on the ceiling, this may be a sign that shingles are missing and need to be replaced. In some cases leaks can also indicate other roofing issues as well, but this is definitely something to have our team take a look at as soon as possible.
  • Missing insulation: If you’ve noticed that your energy bills have been rising for no apparent reason, it’s possible that shingles are missing and heat or cold is escaping from your home. In some cases, you may even be able to see the insulation itself missing if you take a look in your attic.
  • Light shining through: This one’s a bit more difficult to notice, but if you go into your attic on a sunny day and see sunlight shining through, it’s possible that shingles are missing and need to be replaced.

If you’ve noticed any of these signs, or anything else that you believe may indicate that shingles are missing, don’t hesitate to give our team a call. We’ll be more than happy to take a look and let you know for sure, and we can also provide a free estimate for any repairs that may need to be done.

Professional Inspection

If you’re confident something is going on with your roof, but you’re having trouble really nailing down what the problem is, our team here at The Roof Doctor would be more than happy to come out and take a look. We’ll be able to quickly and easily identify any issues that may be present, and we can also provide a free estimate for any repairs that need to be done.

Professionals like ours utilize several methods for identifying missing shingles, including both visual inspections and special infrared cameras. We may even utilize drones, which can view the roof from above without risking anyone’s safety. In most cases, we’ll be able to find any areas that are missing shingles and provide a detailed report on what needs to be done to fix the problem. We can also work with your insurance company if necessary to make sure you get the coverage you need.

For more on how to identify missing shingles on your roof, or to learn about any of our roof repair or replacement services, speak to our team at The Roof Doctor today.

Modern Roofing Advancements for Your New Roof

modern roofing advancements new roof

If you’re in need of a new roof, whether for new home construction or for an existing home or building, your options are far more robust than they would have been for someone in your position even a decade or two ago. Improvements in roofing materials and technology have come a long way in a short time, and you now have a wide range of modern choices for the way you go about installing a new roof.

At The Roof Doctor, we can’t wait to assist you with these and any related needs. We offer roof installations and roof replacements for a variety of homes and structures, utilizing many modern themes and materials that can benefit you in a whole host of ways. What are some of the newer roof advancements that you might consider for any new roof you’re in the process of having installed? Here are several.

Cool Roof Shingles

When we talk about “cool roof” shingles, we’re actually referring to a form of reflective paint that’s applied to your roof’s surface. This paint is specially formulated to reflect solar energy back into the atmosphere rather than absorbing it, which is what typically happens with darker shingles. Your indoor cooling bill can be greatly reduced by replacing an old, dark roof with a newer cool roof alternative.

Early on in its uses, this paint may not have been very cost-effective — it was messy and may have interfered with shingle operations. Today, however, this paint has been refined to a point where it’s an undeniable and sensible option for those who are in need of a new roof. It can lower the surface temperature of your home’s roof by as much as 40 degrees Fahrenheit, which not only keeps your home cooler but is also a major benefit to anyone who lives within its walls.

Synthetic Underlayment

An important but often-underplayed element of any roof is the underlayment, which is the material that’s installed beneath your shingles or tiles. It serves a crucial purpose in keeping your roof watertight and in mitigating the effects of any possible damage between the time when your roof is installed and when you have it replaced a few decades down the road.

Traditional underlayment, though effective, has typically been made from organic felt paper. The advent of synthetic underlayment, however, has changed the game in a few crucial ways. First, it’s much more durable than felt paper, which means it can better protect your roof over the long haul. Second, it’s also lighter and easier to work with, which makes installation quicker and less labor-intensive.

Furthermore, this form of polyurethane underlayment is far better in terms of moisture resistance and any possible water damage, as it can be designed to be waterproof. The result is a longer-lasting underlayment that’s more resistant to mold, mildew, and rot. It’s also resistant to UV rays and other outdoor elements (which means you’ll have less work to do in terms of maintenance) — and maybe best of all, tends to look better than other underlayment options due to its thinness.

If you’re in the market for a new roof, there are several reasons to strongly consider a synthetic underlayment instead of an older felt option.

Architectural Shingles

Another shingle variation that’s exploded in popularity in recent years is the architectural shingle, which refers to a lamination of two or more traditional asphalt shingles together. This creates a 3-D appearance that’s far more attractive, along with a stronger roofing surface that can better handle the elements.

Architectural shingles also tend to be less expensive than their traditional counterparts, and they’re thinner as well — which means you’ll have an easier time installing them and getting the job done in a shorter amount of time. Thus, if you’re looking for a roof that looks great and will also save you some money in terms of installation costs, architectural shingles are definitely worth considering.

In fact, when homeowners are preparing to list their homes on the market for sale, it’s often recommended that they upgrade their roofs by installing architectural shingles. This can not only improve the curb appeal of a home, but it can also raise or restore its resale value — which helps homeowners sell their homes faster, with less hassle and for more money.

Storm Preparation

Especially if you live in any area where severe storms are common, you need to be sure your roof is up to the task of protecting your home against high winds and heavy rains. There are a few different ways to do this, but one of the most effective is to choose impact-resistant shingles for your new roof. These types of shingles have been shown to withstand significant impacts from both wind and hail, making them the perfect option for homeowners in areas where high winds are frequent.

Another way you can make sure your roof is ready for whatever may come its way is to install impact-resistant gutters and downspouts. This can limit the amount of water that accumulates on your roof during a storm, which in turn helps to reduce the likelihood of any damage being done by high winds or heavy rains.

Finally, you should also consider having your roof inspected by a professional before every major storm season. This can help you identify any potential weak spots or areas of concern, so you can address them before they become a bigger problem down the line.

For more on some of the modern roof materials or themes you might consider when installing a new roof on your property, or to learn about any of our roof installation or roof repair services, speak to the team at The Roof Doctor today.